Filming Setup
I got a cheap set of lights and a backdrop stand on Amazon to set up a little studio in a weird attic room that we’ve only been using for storage. I bought the blue screen separately as the set only came with a green backdrop that wouldn’t work with Kiersten’s green overalls.
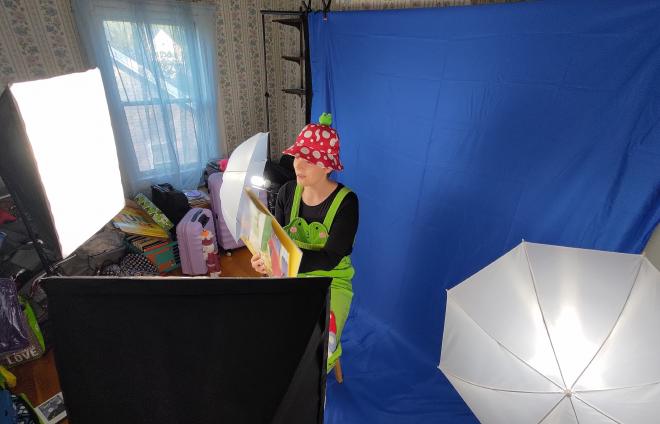
I wouldn’t really recommend this set, but I needed some lights with softboxes on a budget. The main issue I have with it is actually that the backdrop stands aren’t as tall as I thought they would be so shooting anything standing up is not really possible. As you can also see from this photo it was hard to get particularly even lighting across the modestly-sized screen. I’ll probably bring in some desk lamps to help get some more light onto the dark areas for now.
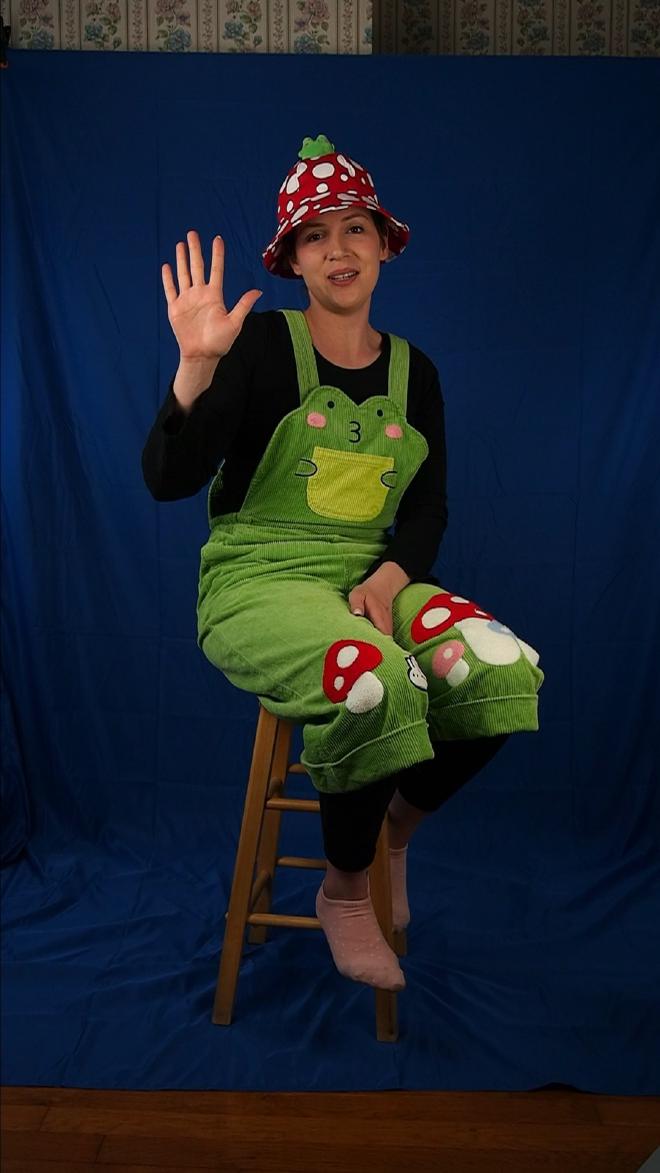
Because there isn’t a lot of space, either in the room or within the bounds of the screen area I set up my camera vertically. I figured this would at least give me the most resolution to work with. Below shows the framing of the shot straight out of the camera. I intentionally underexposed the shot by shortening the exposure time as much as possible to limit the motion blur. A faster lens would be better, but I don’t have one at the same focal length and I’m limited by the size of our room.
Preparing The Footage
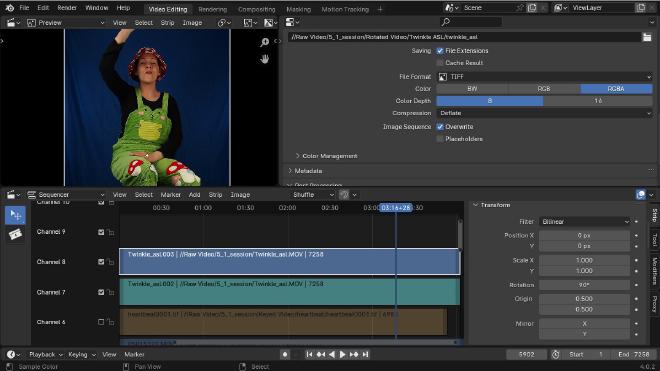
The footage comes out of the camera in .mov format, 1920x1080 at 29.97 frames per second. The first step was to rotate the footage to the vertical orientation and save it as a sequence of tiff images. This makes it easier to work with in blender, and by rendering intermediate steps in a lossless format will prevent stacking any more compression artifacts onto the final product. I was able to use Blender’s video editing tools to do this conversion in a single step by rotating and scaling the video in the strip’s transform properties, and setting the render options to produce tiff files.
Compositing
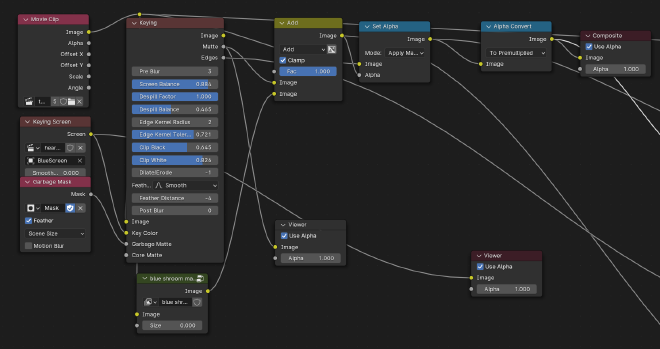
With the footage rotated and converted to an image sequence, the next step is actually keying out the screen in the compositor. After enabling use nodes at the top of the view, I add a Movie Clip node as the input, and the Keying node to do most of the work.
Keying Screen Node
Initially I didn’t get great results with simple adjustments to the keying node parameters, but eventually while looking at the blender docs I stumbled across the Keying Screen node which helped with a lot of the issues I was having. Basically instead of inputting a single key color to the Keying node, a full image can be input instead. The Keying Screen node generates an image to better represent the color of the screen at any given point, thereby making up for the uneven lighting in the source footage.
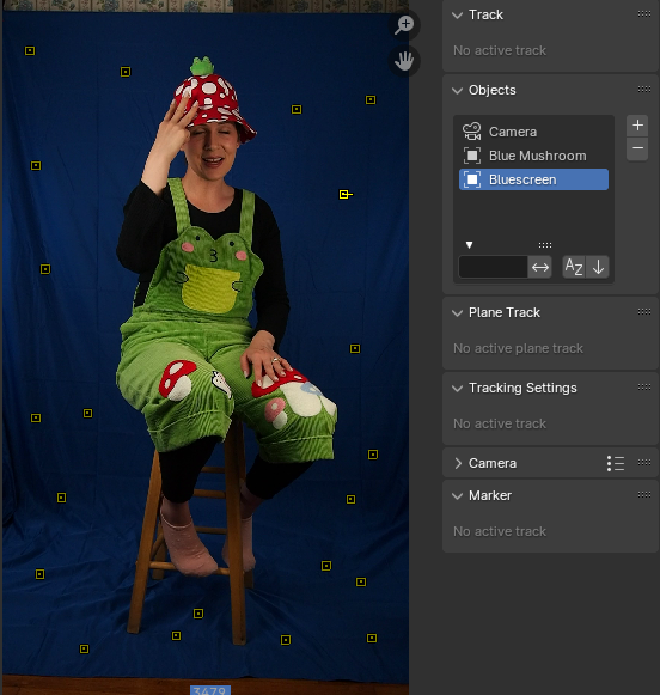
The Keying Screen node uses the same movie clip that we gave to the Keying node as an input, as well as a tracking object which is a set of tracking points which it will sample to produce its image. In the Movie Clip Editor set to tracking mode, a “bluescreen” object is added and tracking points are applied around the clip in different areas of the backdrop as shown below. If the subject occludes any of the tracking markers in the clip, the markers may be animated to move out of the way or enabled/disabled as appropriate. The Keying Screen node will then produce an image for every frame of the clip which compensates for moving shadows on the screen or other irregularities per-frame.
Here’s an example of the output from the Keying Screen node for a frame of my clip.

As you can see, the changes in color across the screen are subtle, but it gives the Keying node a much better color reference to work with than simply selecting a color from an arbitrary point on the backdrop.
Garbage Mask
The other key (pun intended) to preparing the video clip for keying is setting up a garbage mask. In the case of my footage the backdrop doesn’t cover the whole frame, there’s a bit of wall at the top and a bit of floor at the bottom. There are also some particularly dark or wrinkled areas of the backdrop which could confuse the Keying node but fortunately aren’t ever passed over by the subject. This is where a garbage mask is used and fed into the Garbage Matte input of the Keying node.
The mask is authored in the Movie Clip Editor set to mask mode. Here a mask is drawn to cover the wall, floor, and unused areas of the frame. In cases where the subject intersects the mask, the mask handles are animated to make room. The mask for a frame of my clip is shown below.
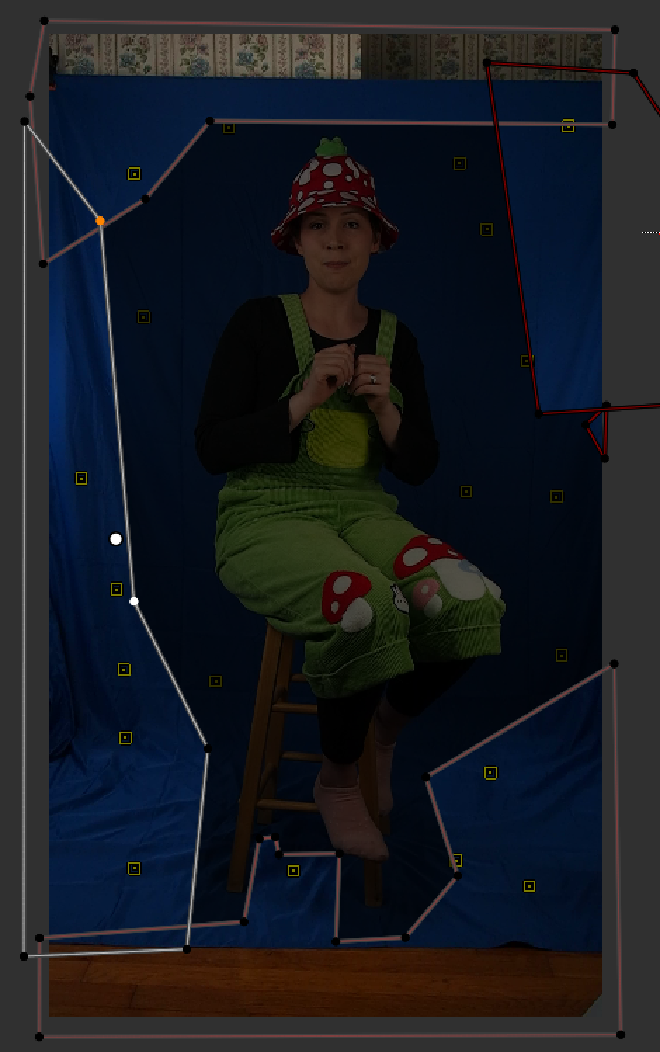
This mask is selected as the input for the Garbage Mask node and fed into the Keying node’s garbage matte input. These masked areas will be completely excluded from the keying output.
Keying Node
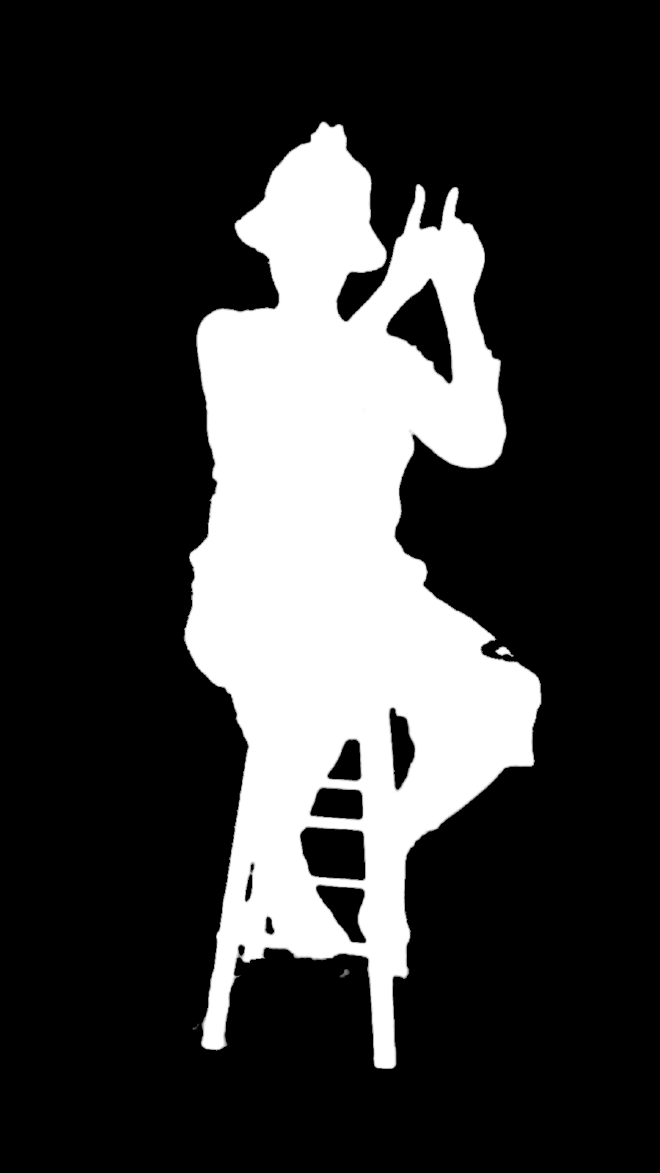
With the inputs for the key set up, all that’s left is to tweak the settings of the keying node to get a clean matte. Attaching a viewer node to the matte output was a good way to get instant feedback on the effect my changes were having. I don’t really have any specific tips on what to change as it will largely depend on your footage, but from the Blender docs I did at least learn that ideally the clip black value should be as low as possible and the clip white value as high as possible to ensure the best separation. The direct output from the keying node’s matte output is shown below.
Fixing Matte Issues
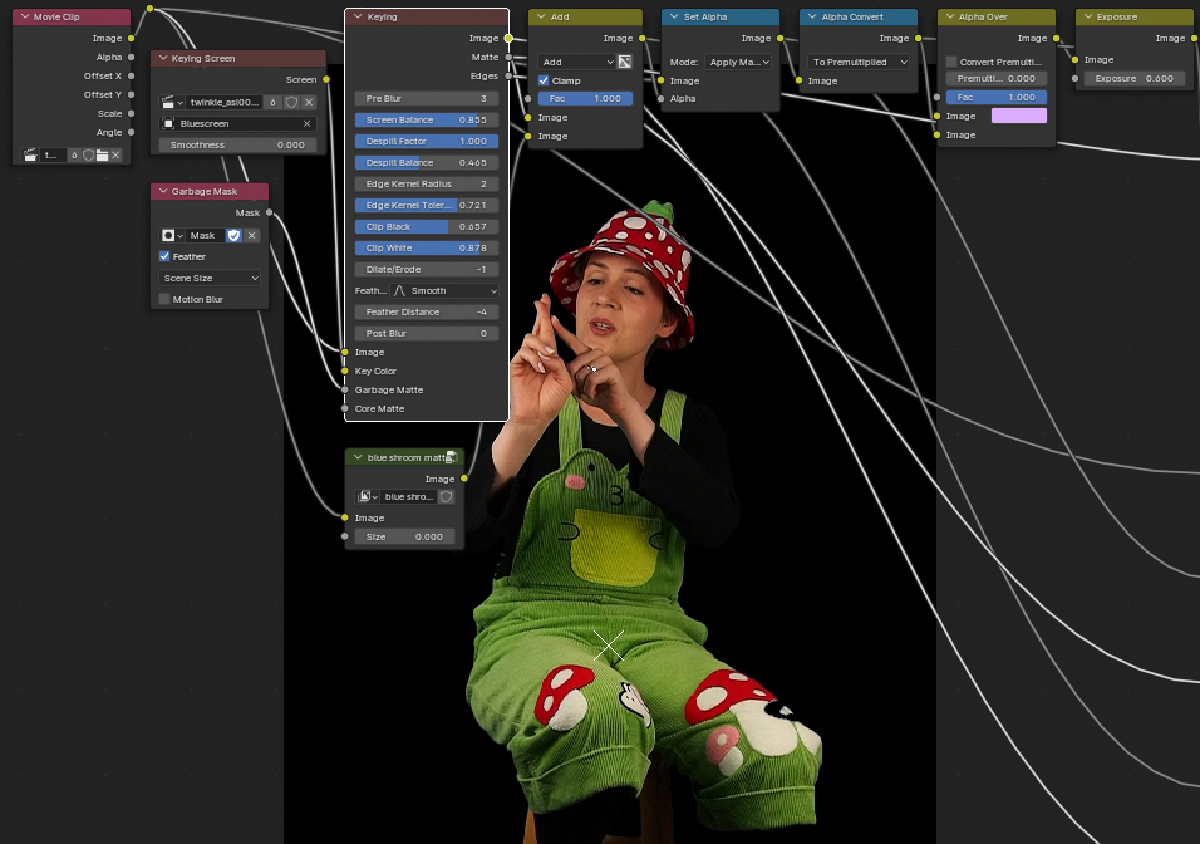
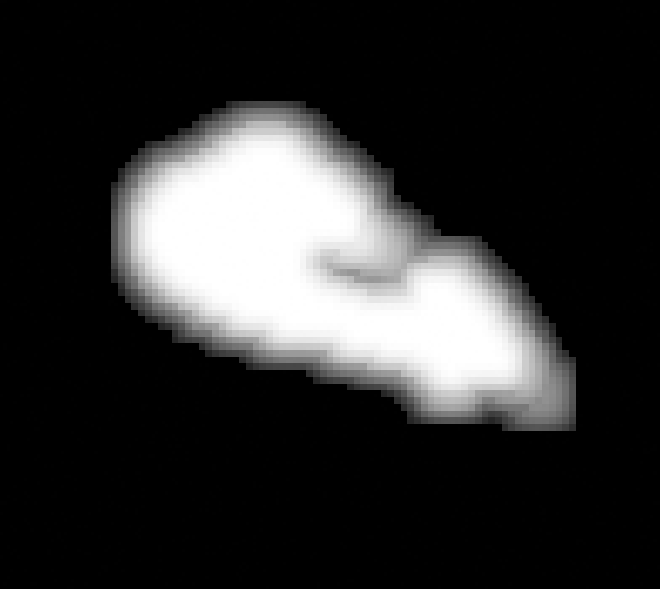
A bluescreen was used instead of a green one for obvious reasons here, but there is still a slight issue caused by a light-blue mushroom design on the left leg. To fix this I had to create a supplemental mask just for that area. The difference between the blue of the mushroom and the blue of the screen was enough to do it automatically, but not within the parameters for keying the rest of the subject. For this I used another set of nodes to isolate this area and create a matte with the specific color I wanted to preserve. This node setup is shown below.
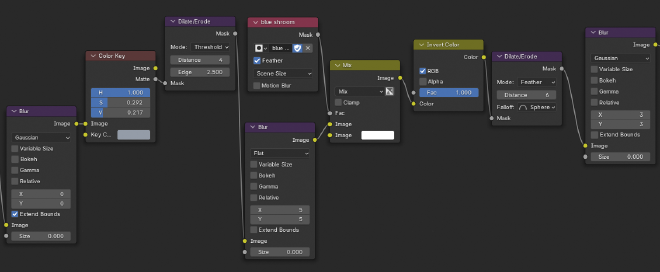
Once again this was created through trial and error, but the gist is to pre-blur the image slightly, use the color key node to isolate the color, dilate the mask and feather the edges. A mask was also used to confine the mask to only the area directly around the mushroom design. The mask was created in the same way as the garbage mask, but the shape was parented to a tracking marker to roughly follow the position. These masks were combined to produce all black except for white in the desired area. These masks were then added together to produce the final mask for the composite.
The Final Result
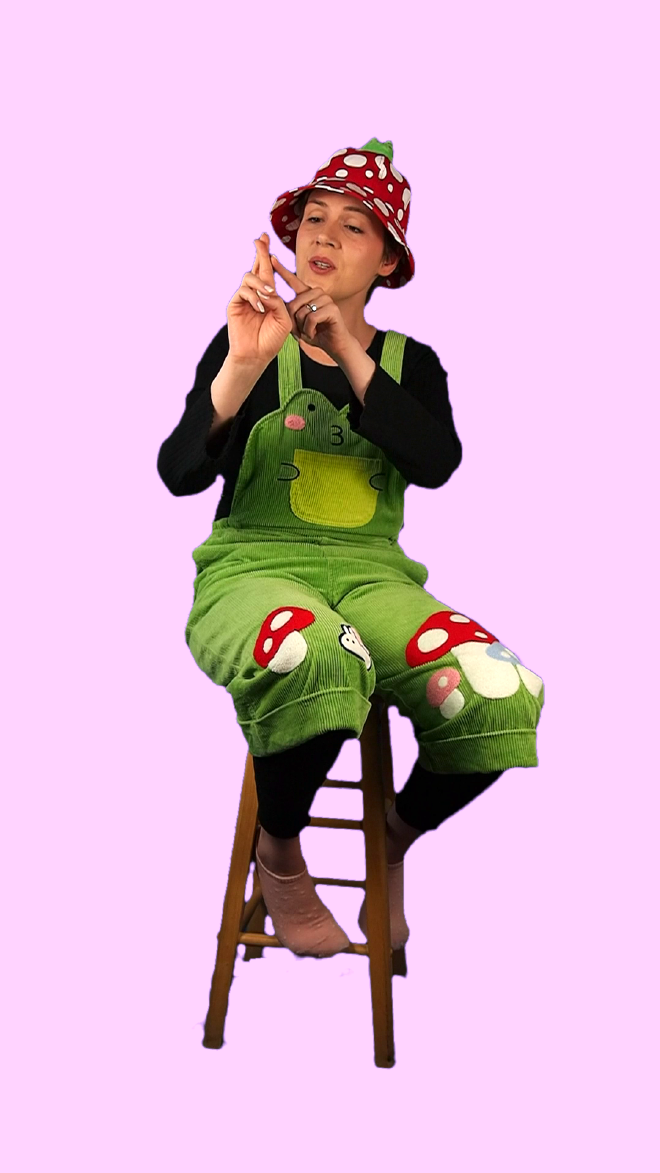
With the mask applied to the video clip, it was overlaid over a solid color just to see the result. There are some issues around the bottom of the stool which reflected the blue of the screen, but I was planning on cropping the clip in anyway. When I composite it with an actual background I’ll apply some color correction and clean up the edges with a bit of a rimlight effect as well.
I hope this was a helpful summation of my process for getting this chroma key from less-than-perfect footage. A lot of the tutorials I looked at barely needed any manual adjustment to get a clean key, and didn’t even mention the Keying Screen node, which I thought was extremely useful. Feel free to drop me a line on mastodon or reach out via email with any questions or comments.
